
How Long Does a Beverage Fridge Take to Cool Drinks?
Key Takeaways
- The displayed temperature, the air inside the fridge, and the temperature of your drinks aren't necessarily the same.
- The more room-temperature drinks you add at once, the more heat your fridge has to remove.
- Starting temperature, container type, loading density, airflow, door openings, and room conditions can all affect cooling time.
- Chill your first round early, then restock in smaller batches based on what guests are actually drinking.
- Keep ready-to-serve drinks separate from drinks that are still cooling and from unopened backups.
- Without a specific model and controlled test conditions, there is no single cooling time that applies to every beverage refrigerator.

Your party starts in a few hours. The display says 38°F, but the beer, soda, and bottled water you just loaded still don't feel cold enough.
It's tempting to toss in the rest of the drinks, keep opening the door to check, or lower the temperature setting. But adding more warm drinks or repeatedly opening the door can make cooling take longer. Lowering the setting won't necessarily help, either.
The display isn't necessarily wrong. It's just measuring something different. Your fridge typically reports the temperature near an internal sensor, not the temperature inside every can and bottle. The air can reach the set temperature before the drinks themselves have fully chilled.
So, how long does a beverage fridge take to cool drinks? There's no single number of hours that works for every fridge. It depends on the starting temperature of the drinks, how many you load, their containers, airflow, and the refrigerator itself.
For party prep, the better question is which drinks need to be cold first, when to load them, and how to restock once guests arrive. A simple cooling plan beats filling every shelf at the last minute.
Appliance Cooldown, Drink Chilling, and Temperature Recovery Are Different Processes
Your beverage fridge is actually doing three different jobs:
- Appliance cooldown: The refrigerator itself cools from room temperature to its normal operating temperature.
-
Drink chilling: The drinks inside gradually lose heat until they reach the desired temperature.
- Temperature recovery: The fridge cools back down after the door opens or warmer drinks are added.
These processes can overlap, but they're not the same thing.
A newly installed or recently powered-on fridge may start producing cold air before the walls, shelves, and rest of the interior have fully stabilized. If you load it with room-temperature drinks right away, it's cooling both its interior and the drinks at the same time.
Even after the fridge has stabilized, warm drinks add more heat. The liquid and its packaging carry heat into the cabinet, and the refrigerator has to remove it.
When the display returns to your set temperature, that only tells you the sensor area has cooled. It doesn't mean the center of every drink has caught up.
Door use matters, too.
Grabbing one can is quick. Leaving the door open while someone searches for a certain flavor is another story. Rearranging an entire shelf or adding several batches of warm drinks gives the fridge even more cooling work to do.
And don't confuse storage capacity with cooling speed.
A refrigerator advertised to hold 180 cans may fit that number under a specific shelf arrangement. But that doesn't mean it can quickly chill 180 room-temperature cans at once.
If you're still figuring out how much space you need, our guide to choosing the right beverage fridge size explains how mixed cans and bottles, shelf spacing, and restocking habits affect usable capacity.
Capacity tells you how much fits. Cooling time tells you when those drinks will be ready to serve.

What Affects Beverage Cooling Time?
There's no universal cooling time that works for every home, drink, and refrigerator. Six factors matter most.
| Factor | Why It Matters | Practical Takeaway |
|---|---|---|
| Starting Drink Temperature | Room-temperature drinks contain more heat than beverages transferred from a kitchen refrigerator. | Load warm drinks earlier and avoid assuming they will be ready as soon as the display reaches its set temperature. |
| Quantity Loaded | A large batch introduces more heat into the cabinet and increases the work required to cool the full load. | Chill the core inventory first, then add smaller restocking batches when possible. |
| Container Type and Size | Slim cans, standard cans, glass bottles, and larger containers transfer heat at different rates. | Test representative drinks rather than judging the entire cabinet from one package type. |
| Airflow Around the Drinks | Tightly packed containers can block cold-air circulation and create uneven cooling zones. | Leave small gaps around containers and keep interior vents unobstructed. |
| Door-Opening Frequency | Every door opening allows warmer room air to enter and interrupts temperature recovery. | Organize popular drinks near the front and limit unnecessary browsing during the party. |
| Room Temperature | A warm kitchen, bar area, garage, or outdoor-adjacent room increases the refrigerator’s cooling load. | Allow more preparation time when the surrounding environment is warmer than usual. |
| Installation and Ventilation | Restricted ventilation can reduce heat dissipation and make temperature recovery less efficient. | Follow the manufacturer’s clearance requirements and use a model designed for the intended installation type. |
Starting temperature is one of the easiest factors to overlook.
Soda stored in an indoor pantry won't necessarily cool at the same rate as an identical case brought in from a hot garage or car. A last-minute bulk-store run can introduce a lot more heat than drinks that have already been sitting somewhere cool.
Packaging matters, too.
A standard 12-ounce can, a slim can, a longneck beer bottle, and a large plastic water bottle all take up different amounts of space and hold different volumes of liquid.
Wider bottles change how tightly you can pack the shelves. Taller containers may require shelf adjustments, which can also affect how air circulates.
That means two refrigerators holding the same number of drinks may cool differently depending on what's inside.
If you're dealing with a mix of cans and bottles, our guide to organizing a beverage fridge by container size and access frequency can help you create a layout that's easier to use.
A bigger refrigerator isn't automatically a faster-cooling one, and a smaller model doesn't necessarily recover more quickly.
Cooling performance also depends on the refrigeration system, fan-assisted airflow, insulation, door seals, room temperature, and how you load and use the appliance.
A 100-can or 180-can rating alone can't tell you how quickly a batch of warm drinks will be ready.

When Should You Load a Beverage Fridge Before a Party?
Skip the hunt for one magic number of hours. Plan around the stages of your party instead.
That way, the drinks guests will reach for first have more time to chill, even when different containers cool at different speeds.
The Day Before: Stabilize the Refrigerator and Plan the Backup Inventory
If your beverage fridge is new, was recently moved, or has been unplugged, follow the setup and startup instructions in the manual.
Once it's running normally, check the temperature setting, door seal, shelf positions, interior vents, and ventilation space around the appliance.
Built-in and freestanding refrigerators can have different ventilation requirements, so check the guidelines for your specific model rather than guessing.
Next, decide where your backup drinks will stay.
Unopened, shelf-stable soda, sparkling water, and bottled water can remain in a suitable pantry or storage area until you need them.
Keeping them out of the fridge for now leaves more room for the drinks you want cold first, along with anything guests might bring.
You don't need to fill every inch the night before.
Leaving some space makes it easier to handle different bottle sizes, separate later additions, and keep popular drinks easy to reach.
The Morning of the Party: Chill the First Round First
Start with what people will reach for as soon as they arrive.
That might include bottled water, sparkling water, familiar sodas, a few beer options, and a good selection of nonalcoholic drinks.
These should have plenty of time to chill, so don't leave them until the last hour.
Less popular flavors, duplicate packs, and extra cases can wait.
Loading everything at once may crowd the shelves, restrict airflow, and make it harder to tell what's cold and what still needs time.
It's also best to avoid putting full cardboard cases inside unless your refrigerator's manual and shelf design specifically allow it.
Cardboard packaging takes up space, makes drinks harder to reach, and may interfere with airflow around individual cans and bottles.
Focus on getting your first round ready, not squeezing every drink into the fridge at once.
Several Hours Before Guests Arrive: Check the Drinks, Not Only the Display
Spot-check a few drinks instead of relying entirely on the control panel.
See whether different containers are as cold as you'd like, and make sure tall bottles, glass bottles, and tightly packed cans still have enough room for airflow.
If one area looks overcrowded, make a quick adjustment. Just avoid leaving the door open for a complete reorganization.
Keep chilled drinks separate from those you recently loaded.
One easy approach is to use the front or a designated shelf section as your Ready-to-Serve area, while keeping drinks that are still cooling in another section.
That way, guests can grab what they want without touching several cans or asking which ones are cold.
Once everything's organized, close the door and give the drinks time to chill.
Opening it every few minutes to check won't speed things up.
Shortly Before the Party: Stop Adding Large Warm Loads
The last hour before guests arrive usually isn't the best time to load several cases of room-temperature drinks.
They add heat, the air inside may temporarily warm up, and you might end up opening the door repeatedly to see whether the temperature has recovered.
If guests bring room-temperature beverages, don't mix them into your Ready-to-Serve area.
Set aside a separate Cooling Next section so everyone can tell which drinks are cold and which still need time.
Need a few drinks cold quickly? An ice-water bath can be a handy short-term option.
A beverage fridge works best when you plan ahead rather than relying on it for last-minute chilling.
And don't leave carbonated drinks or glass bottles in the freezer and forget about them. Freezing and expansion can damage the contents or containers.
During the Party: Use Three Inventory Levels
Once guests arrive, keep your drinks organized into three simple groups:
- Ready to Serve: Fully chilled drinks where guests can easily see and reach them.
- Cooling Next: A smaller batch added later that still needs time to chill.
- Backup: Unopened drinks that don't need to go into the refrigerator yet.
Restock based on what's actually disappearing, not by filling every empty space.
If sparkling water is going fast, add a few more cans. If that specialty soda is barely being touched, there's no reason to load another full pack.
As space opens up, move chilled drinks from Cooling Next into the Ready-to-Serve area.
Keep bottled water and nonalcoholic options visible throughout the gathering instead of letting them get buried behind less popular drinks.
A clear layout means less time searching with the door open. It also makes it easier to see what needs restocking.
Your goal isn't a fridge that always looks full. It's a steady supply of cold drinks without adding more warm inventory than necessary.
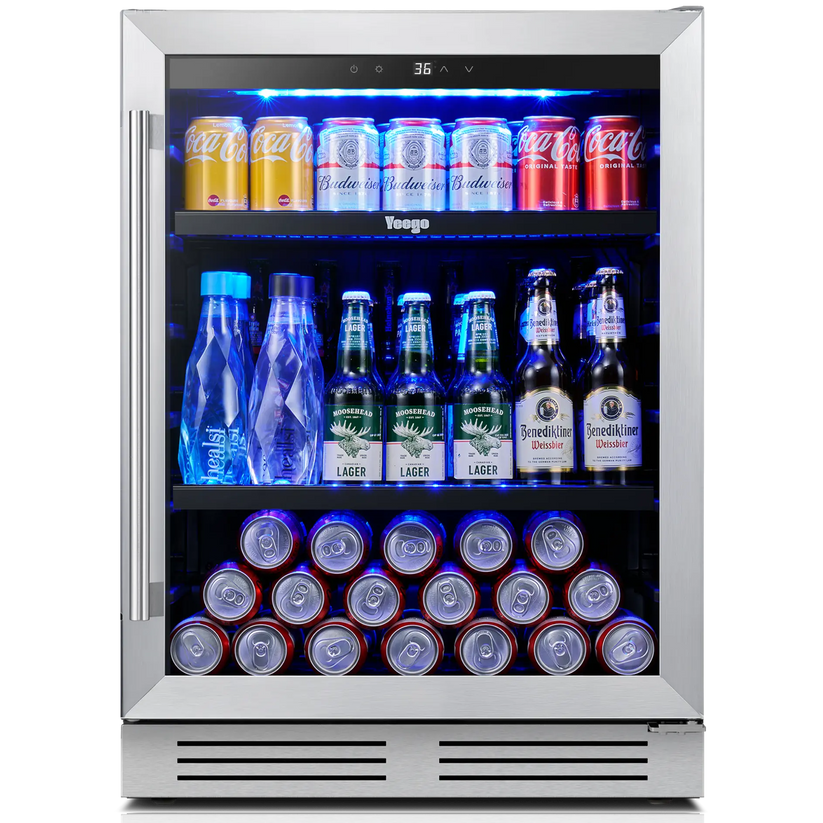
Yeego 24" Beverage Cooler
How to Test Your Beverage Fridge's Actual Cooling Time
If you host regularly, a simple, repeatable test can tell you more than a generic cooling estimate.
You don't need laboratory equipment, but you do need to record a few conditions. Otherwise, saying a drink was "cold in an hour" or "took all night" doesn't tell you much.
Start by noting:
- Refrigerator model and temperature setting
- Room temperature
- Starting temperature of the drinks
- Container types and sizes
- Number of drinks loaded
- Shelf positions
- Whether the door was opened during the test
Try including a few different containers, such as a standard soda can, a slim can, a glass bottle, and a plastic water bottle.
Remember that cabinet temperature and drink temperature are two different measurements.
Cabinet temperature can help show when the refrigerator has recovered, while actual drink-temperature measurements show chilling progress.
An infrared thermometer reads the container's surface, which may not match the temperature at the center of the liquid. If you're testing drink temperatures, note how you're measuring them so the results are easier to interpret.
Here's a simple way to organize your test:
| Checkpoint | What to Record | Why It Matters |
|---|---|---|
| Before Loading | Cabinet temperature, room temperature, and starting drink temperature | Establishes a clear baseline for evaluating the cooling process. |
| First Check | Displayed temperature, representative drink temperature, and any door openings | Shows the difference between cabinet-air temperature and the temperature of the drinks themselves. |
| Midpoint | Temperature changes across package types, shelves, and cabinet positions | Identifies differences caused by container size, placement, or restricted airflow. |
| Before the Party | Which drinks have reached serving temperature and which still require cooling | Determines whether the beverage selection is genuinely ready for guests. |
| After Restocking | Number and starting temperature of newly added drinks, plus recovery time | Reveals how warm refills affect cabinet temperature and real-world recovery performance. |
Keep the conditions consistent between tests.
A fridge loaded with a few prechilled cans and another packed with warm glass bottles won't give you a useful comparison.
If you're comparing two refrigerators or loading methods, use similar quantities, starting temperatures, container types, and door-opening patterns.
The goal isn't to discover one cooling time that applies to every drink.
It's to understand how the drinks you usually buy cool under your normal room conditions and loading habits.
That gives you a better idea of what to chill first before your next get-together.
Is Slow Cooling Normal Recovery or a Sign of a Problem?
It's normal for a beverage fridge to need time to cool back down after startup, a major temperature adjustment, frequent door openings, or the addition of a large batch of warm drinks.
A hot room or a major shelf rearrangement can also make one cooling cycle different from another.
If your fridge seems slower than expected, start with a few simple checks.
Make sure the door closes completely, nothing is caught in the seal, and drinks aren't blocking the interior vents.
Check for overly tight loading and make sure the appliance's external ventilation area is clear.
Also look at what's around it.
Is it near an oven, heating vent, or direct sunlight?
If your fridge is in a garage, basement, or another space without consistent climate control, make sure the model's approved ambient-temperature range supports those conditions.
Before assuming something is wrong, ask yourself two questions:
- Did you recently add a large number of warm drinks?
- Has the door been opened repeatedly?
Either situation can cause a temporary delay even when the refrigerator is working normally.
However, some signs are worth checking more closely.
Consult the manual or contact the manufacturer if your fridge consistently fails to reach its specified temperature under normal room conditions and reasonable loading.
Other possible warning signs include:
- A door seal that doesn't close properly
- Persistent, unusual frost or condensation
- Error codes
- Unusual sounds that differ from normal operation
- A noticeable decline in cooling performance
Repeatedly lowering the temperature setting or restarting the fridge may not fix the underlying problem.
When in doubt, follow your model's troubleshooting instructions rather than guessing.
Do Not Compare Beverage Refrigerators by Can Count Alone
If you entertain regularly or want a dedicated drink station, advertised can capacity is only the starting point.
Compare the operating temperature range, airflow system, adjustable shelves, and how well the interior accommodates the cans and bottles you actually buy.
You'll also want to check whether the model supports built-in or freestanding installation.
Placement matters, too.
If you're deciding where to put a beverage fridge in an open-plan kitchen or living area, think about operating noise, seating distance, door clearance, and how easily you can restock without getting in everyone's way.
For a garage or basement, check whether the model is rated for the room's temperature conditions and installation requirements.
Two refrigerators with similar capacity ratings can feel very different in everyday use because of their shelf layouts, ventilation needs, and accessibility.
Here are a few practical size considerations:
-
15-inch beverage refrigerator: Can work well in smaller spaces or for households with a focused drink selection that don't mind restocking more often.
-
24-inch beverage refrigerator: Offers more flexibility for mixed cans and bottles, plus extra room for everyday use and weekend guests.
- Tall beverage refrigerator: May be a better fit if you keep a larger supply of cold drinks or prefer restocking less frequently.
These sizes help you compare storage options, but they don't automatically predict cooling speed.
Your final choice should account for the specific model, available space, installation requirements, and your everyday drink habits.
Think about how you use your fridge on a normal week, not just how many drinks you need for one big party.

Party-Ready Does Not Mean Completely Full
A packed beverage fridge might look party-ready, but that doesn't mean every drink inside is cold.
A more reliable approach is to let the refrigerator stabilize, chill your first round early, and keep newly added drinks separate from your backups.
Add room-temperature drinks in smaller batches, leave enough space for airflow, and make it easy for guests to see what's ready.
That way, you spend less time managing drinks and more time enjoying the party.
Your fridge doesn't have to be full every minute. It just needs to have cold drinks ready when people want them.
Planning a drink station for your living room, media room, garage bar, or entertaining space?
Explore Yeego beverage refrigerators and compare them based on what you normally stock, how often you restock, and the space you have available.
Start with how you actually use the space, then choose a fridge that fits your routine long after the party's over.
Frequently Asked Questions
1. Can soda, sparkling water, and beer share the same beverage refrigerator setting?
Usually, yes. But no single setting gives every drink its ideal serving temperature.
Soda and sparkling water are often served quite cold, while beer preferences vary by style.
Choose a setting within your refrigerator's operating range that works for the drinks you store most often, and follow any storage instructions on the packaging.
2. Can opened cans or bottles stay in a beverage refrigerator?
It depends on the drink and how it's stored.
Reseal opened containers securely or transfer the drink to a clean, covered container when appropriate.
This helps reduce spills, carbonation loss, odor transfer, and contamination.
Drinks with perishable ingredients need extra care. Always follow their storage instructions and make sure your beverage fridge can maintain the required refrigeration temperature.
3. Can wine be stored with soda and beer in a single-zone beverage refrigerator?
For short-term chilling before serving, it can work. For longer-term wine storage, it's not always ideal.
Soda and many beers are commonly kept colder than the temperatures used for storing wine over time.
If wine is a regular part of your drink selection, a dedicated wine fridge or dual-zone model may give you better temperature control than keeping everything at one setting.
4. Will lowering the set temperature make drinks cool faster before a party?
Not necessarily.
Lowering the set temperature doesn't automatically increase your refrigerator's maximum cooling capacity.
It may keep the compressor running longer, but it can't instantly remove the heat from several cases of room-temperature drinks.
Choose an appropriate setting within your model's approved range, start chilling your priority drinks early, and avoid repeatedly changing the controls while the refrigerator is still stabilizing.