
How to Organize a Beverage Fridge for Coffee & Beer
Key Takeaways
- Shelf-stable bottled coffee, refrigerated ready-to-drink coffee, homemade cold brew, and coffee with dairy all have different storage needs.
- Food-safe refrigeration, storage temperature, and serving temperature are related, but they’re not the same thing.
- Coffee and beer can share a fridge as long as it can maintain the temperature required by the most temperature-sensitive drink inside.
- Start with container height, diameter, opened status, and how often you reach for each drink. Making everything look perfectly neat can come later.
- Advertised capacity is based on a specific can size and loading pattern. Mixed bottles and cans change how much you can actually fit.
- If your layout only works with blocked vents, unstable stacks, or constant shelf removal, the fridge itself may be the problem.

A beverage fridge might hold bottled cold brew, sparkling water, 12-ounce soda cans, slim cans, longneck beer bottles, and a few specialty drinks saved for the weekend. They all taste better cold, but they don’t all belong in the same layout.
The mess usually shows up a few days after you restock. Your morning coffee gets pushed behind the beer. One tall bottle forces you to pull out a whole shelf. Opened cold brew ends up mixed in with sealed drinks. The fridge looks full, but the drinks you actually want are hard to find.
A good beverage fridge organization system answers four questions:
- Does this drink need to stay refrigerated the whole time?
- Do its storage needs change after you open it?
- How much space does the container really take up?
- Can you grab it without moving several other drinks first?
Once you’ve answered those questions, cold brew, soda, sparkling water, and beer can all share one fridge. The key is to organize by storage needs, opened status, and container size, not just by drink type or package color.
Storage Safety and Serving Temperature Aren’t the Same
Some drinks need to stay cold for more than flavor. Their ingredients, opened status, or packaging instructions may require refrigeration.
FoodSafety.gov recommends keeping your refrigerator at 40°F or below for foods and beverages that need refrigeration. Still, always follow the label and the manufacturer’s instructions for the specific drink you’re storing.
If a bottle says “Keep Refrigerated,” don’t raise the temperature just because it shares space with beer or soda. Your beverage fridge also needs to maintain the required temperature consistently.
Beer is a little different. Steady, cool storage can help protect its quality. According to the Brewers Association, storing beer too warm can affect its flavor and aroma, while serving it too cold can temporarily mask some of those characteristics.
A simple approach is to store your beer cold, then let a particular bottle warm slightly in the glass if needed. You don’t have to change the temperature of the whole fridge for one beer style.
Curious about how temperature affects aroma and flavor? Check out our guide to beer serving temperature.
A single-zone beverage fridge has one shared temperature environment. Moving a drink to a different shelf doesn’t create a second temperature zone.
You may notice small temperature differences inside the cabinet, but don’t rely on them as separate storage zones unless you’ve measured them and the appliance manual supports it.

Cold Brew Isn’t One Storage Category
“Can cold brew go in a beverage fridge?” sounds like a simple question.
The answer depends on what kind of cold brew it is, whether it has been opened, and what’s in it.
Commercial Ready-to-Drink Coffee
Some unopened ready-to-drink coffees are shelf-stable, while others need to stay refrigerated.
The bottles can look nearly identical, so go by the storage label rather than the product name or packaging.
For shelf-stable drinks, chilling before opening is mostly about how you prefer to drink them.
Refrigerated products should stay within their labeled storage conditions. Once you open either type, check whether the manufacturer provides different storage instructions.
Homemade Cold Brew
Homemade cold brew needs a little more care when it comes to containers and dates.
After you brew and filter it, transfer it to a clean container with a secure lid. Label it with the date you made it so it doesn’t turn into a mystery bottle at the back of the fridge.
There’s no single storage window that works for every recipe. Hygiene, concentration, filtering, container cleanliness, added ingredients, and temperature all play a part.
Follow the refrigeration guidance from a reputable recipe, and discard it if you’re unsure how it was prepared or stored.
Cold Brew With Milk or Creamer
Once you add milk, creamer, or another perishable ingredient, storage should follow the needs of the most temperature-sensitive ingredient.
If your beverage fridge can’t reliably maintain the required temperature, or it isn’t designed for perishable items, keep the mixed coffee in your regular refrigerator.
Can Cold Brew and Beer Share the Same Beverage Fridge?
Yes, as long as these four things are true:
- The fridge can consistently meet the strictest refrigeration requirement of any drink inside.
- Homemade and opened drinks are stored in secure, leak-resistant containers.
- Bottles and carafes stand safely without unstable stacking.
- Your shelf setup leaves enough room for proper airflow.
Coffee and beer don’t usually need separate fridges.
What you do need to separate is opened and sealed drinks, standard and unusually shaped packaging, and drinks that simply taste better cold versus drinks that actually need refrigeration.
Sharing a fridge also doesn’t mean sharing a shelf.
Don’t put your everyday cold brew carafe behind weekend beer bottles, and don’t let an opened drink get lost among sealed ones.
Measure the Packages, Not Just the Advertised Capacity
Beverage fridge capacity is usually listed using standard cans, but most of us store a mix of container sizes.
A standard 12-ounce can, a slim can, and a tall can may hold about the same amount of liquid, but they take up shelf space differently.
Beer bottles add shoulders, necks, and wider bases. Bottled coffee varies by brand, and a homemade cold brew carafe may need extra room for a lid, handle, or pouring.
Before you rearrange anything, measure:
- The full height of the container
- Its widest diameter
- The room you need to lift or slide it out
- Whether the surrounding space will still be usable after you adjust the shelf
Pulling out a whole shelf for one tall bottle can take away several rows of standard-can storage.
On the other hand, squeezing the shelf gap too tightly can make drinks hard to remove without scraping the shelf above or knocking over nearby bottles.
| Container Format | What Changes Inside the Fridge | Practical Storage Approach |
|---|---|---|
| Standard 12-Ounce Can | Its relatively consistent height and diameter make it easier to arrange in compact rows. | Use a stable front-to-back row and keep enough clearance around nearby air vents. |
| Slim Can | It is narrower and often taller than a standard can, so it may tip or move between wider containers. | Group slim cans together or use a compatible divider instead of mixing them loosely with standard cans. |
| Tall Can | It requires more vertical clearance and may prevent a shelf from remaining at its original height. | Create one dedicated tall-can section rather than raising several shelves throughout the fridge. |
| Longneck Beer Bottle | The wider base, shoulder, and narrow neck use space differently from a cylindrical can. | Store bottles upright in a secure group and avoid unstable stacking. |
| Bottled Cold Brew | Bottle height and diameter can vary considerably between brands and package formats. | Measure the tallest bottle you regularly buy and keep frequently used coffee near the front. |
| Homemade Cold Brew Carafe | The lid, handle, and pouring motion require more clearance than the container dimensions alone suggest. | Reserve a tall, accessible area with enough side and overhead space for safe removal. |
You don’t have to fill every inch.
Space that lets you pull out a bottle, read a date label, and wipe down a shelf is still useful space.
If mixed package sizes are cutting into the can count you expected, our guide to choosing the right beverage fridge size explains how rated capacity can differ from everyday usable capacity.
Build Five Functional Zones
These zones don’t have to match fixed top, middle, or bottom shelves.
Vents, sensors, and shelf designs vary from model to model. Think of these as functional zones, then place each one where it makes the most sense for your fridge.
1. Standard-Can Zone
Use this area for soda, sparkling water, and other similarly sized standard cans.
Matching sizes reduce wasted gaps and make rotation easier. Put newer cans behind older ones so the older stock stays easy to see and grab.
If a drink only shows up two or three times in your fridge, it doesn’t need a whole row.
Let it share space with something of a similar size and use frequency, as long as the labels are easy to tell apart.
2. Slim- and Tall-Can Zone
Slim and tall cans can throw off shelves designed around standard cans.
Keep them together so you only have to adjust one section instead of raising shelves throughout the fridge.
It can also make caffeinated, nonalcoholic, or zero-sugar options easier to spot.
Don’t assume all slim cans are the same height. Measure the ones you actually buy.
3. Beer-Bottle Zone
Glass bottles are heavier than cans and can break more easily if they’re stored in an unstable setup.
Choose a shelf with solid support and enough room to keep bottles upright.
Check your fridge’s shelf-weight and loading guidance before storing a large number of bottles together.
If beer is only a small part of what you keep stocked, give the bottles one defined section instead of spreading them across several shelves.
That makes it easier to see how much you have while keeping weekend beer from blocking the coffee or sparkling water you reach for during the week.
4. Cold Brew and Tall-Container Zone
This zone is all about stability and easy access.
Wide bottles, glass carafes, and containers with handles need enough room to lift or slide forward.
Don’t wedge them tightly between shelves or line small cans up in front of them.
If cold brew is part of your morning routine, give it a fixed spot that’s easy to reach.
You shouldn’t have to move glass bottles or clear half a shelf just to grab your coffee.
5. Opened-and-Dated Zone
Keep opened and homemade drinks separate from sealed stock.
Use this area for containers that need:
- A visible preparation or opening date
- A secure lid or closure
- Easy spill checks
- First-in, first-out rotation
- Clear separation from unopened replacements
A best-by date, preparation date, and opening date all mean different things.
Label homemade cold brew and opened drinks clearly so you’re never left guessing about how long they’ve been there.
A small dedicated section is usually enough.
The goal is to see each drink’s status at a glance, not to add bulky organizers that take up more space.
Adjust the Layout to Match What You Drink
Give your shelf space to what you actually use instead of giving every category equal room.
| Household Pattern | Give More Space To | Keep Available |
|---|---|---|
| Coffee-First | Cold brew carafes and bottled coffee | A smaller section for cans and beer |
| Balanced Everyday Use | Coffee, standard cans, slim cans, and bottles | One clearly visible opened-and-dated area |
| Beer-Heavy Entertaining | Beer bottles and tall cans | A fixed section for coffee, water, and nonalcoholic drinks |
Even if you’re stocking a beer-heavy home bar, keep everyday coffee, water, and nonalcoholic options easy to grab.
And if you’re coffee-first, you don’t need to give up a whole shelf for beer that only shows up on occasional weekends.
If the extra stock is for a watch party, our guide to stocking game day drinks without overbuying can help you plan quantities separately.
Protect Airflow and Cooling Performance
Clear bins, can dispensers, and stacking racks can help you stay organized, but they shouldn’t get in the fridge’s way.
Any organizer should:
- Leave internal vents clear
- Let air circulate around your drinks
- Fit your actual shelf dimensions
- Be easy to remove and clean
- Keep glass bottles steady
Filling every visible gap doesn’t automatically make your space more efficient.
Drinks still need enough room for safe removal, and airflow should stay consistent with the manufacturer’s loading instructions.
Airflow requirements also depend on how the fridge is installed, so review the differences between built-in and freestanding beverage fridges before placing a unit inside cabinetry.
The temperature shown on your fridge display comes from a sensor reading. It doesn’t necessarily match the temperature of the liquid inside every container.
Room-temperature drinks, a packed fridge, and frequent door openings can all affect how long it takes the contents to reach the target temperature.
For drinks with specific refrigeration requirements, use an independent appliance thermometer when appropriate and follow your model’s operating guidance.
When Is the Problem Capacity, Not Organization?
Sometimes your fridge simply needs more space or a different internal layout.
It may be time to rethink your fridge’s size or internal setup if:
- Weekend stock keeps crowding out your everyday coffee and nonalcoholic drinks
- The tall containers you use often require permanently removing several shelves
- Getting to your cold brew means moving multiple rows of bottles and cans
- Fitting more in depends on blocking vents or stacking containers unsafely
A 15-inch beverage fridge can work well for a small, focused everyday lineup.
A 24-inch or tall beverage refrigerator generally gives you more flexibility for mixed bottles, cans, and containers you reach for often.
Don’t compare fridges by can count alone.
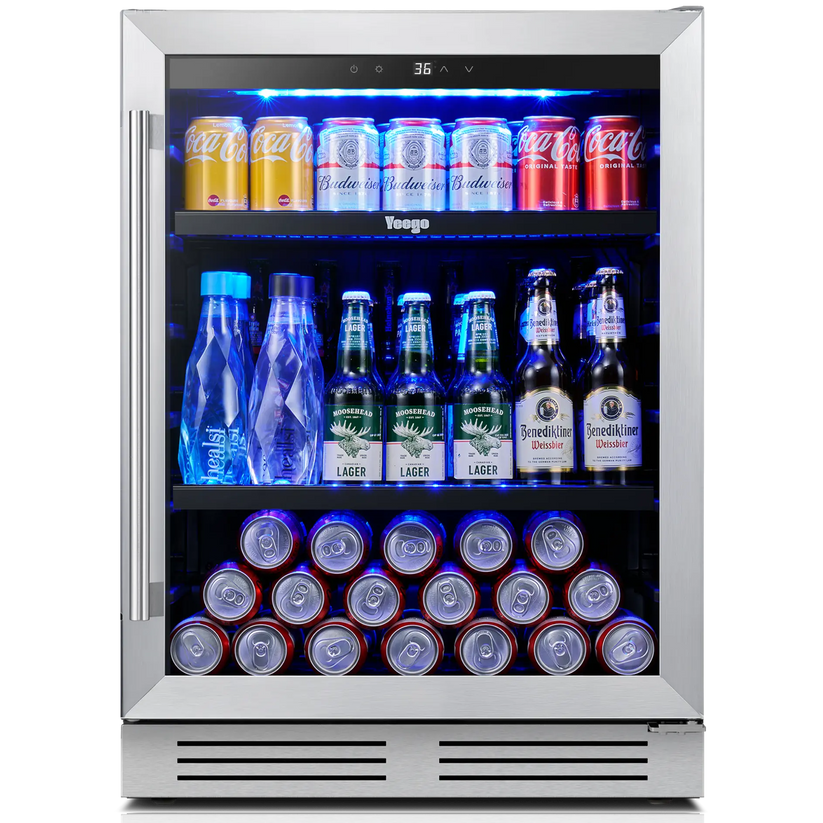
Yeego 24" Beverage Cooler
Internal dimensions, adjustable shelves, temperature range, installation type, and mixed-container capacity all affect how much usable storage you’ll actually get.

A Good Beverage Fridge Should Be Easy to Live With
Your beverage fridge doesn’t have to look picture-perfect every time you open the door.
It just needs to keep your everyday drinks within reach, opened drinks easy to spot, and the bottles and cans you actually buy securely in place.
If you can grab your morning coffee without moving the beer, your standard cans fit without blocking airflow, and your dated cold brew isn’t lost in the back, your layout is working.
Cold brew, soda, sparkling water, and beer can all share one fridge. They just don’t play the same role.
What they need is a setup that fits how each one is stored, handled, and used.
If your current fridge can’t give you that flexibility, take a look at Yeego beverage fridges in different capacities, container formats, and installation styles.